You're flying a DJI drone? Or are you just going to buy it? Look at the possibilities of DJI Fly, without which you will not fly anywhere.
There's quite a few talk about DJI dronesbut almost never DJI Fly appwhich is essential to safely, comfortably and creatively fly drones of this manufacturer. I decided to change that and look at her most interesting functions. Both from the position of a individual who is just beginning and individual who already has hours in the air.
What is worth knowing first?
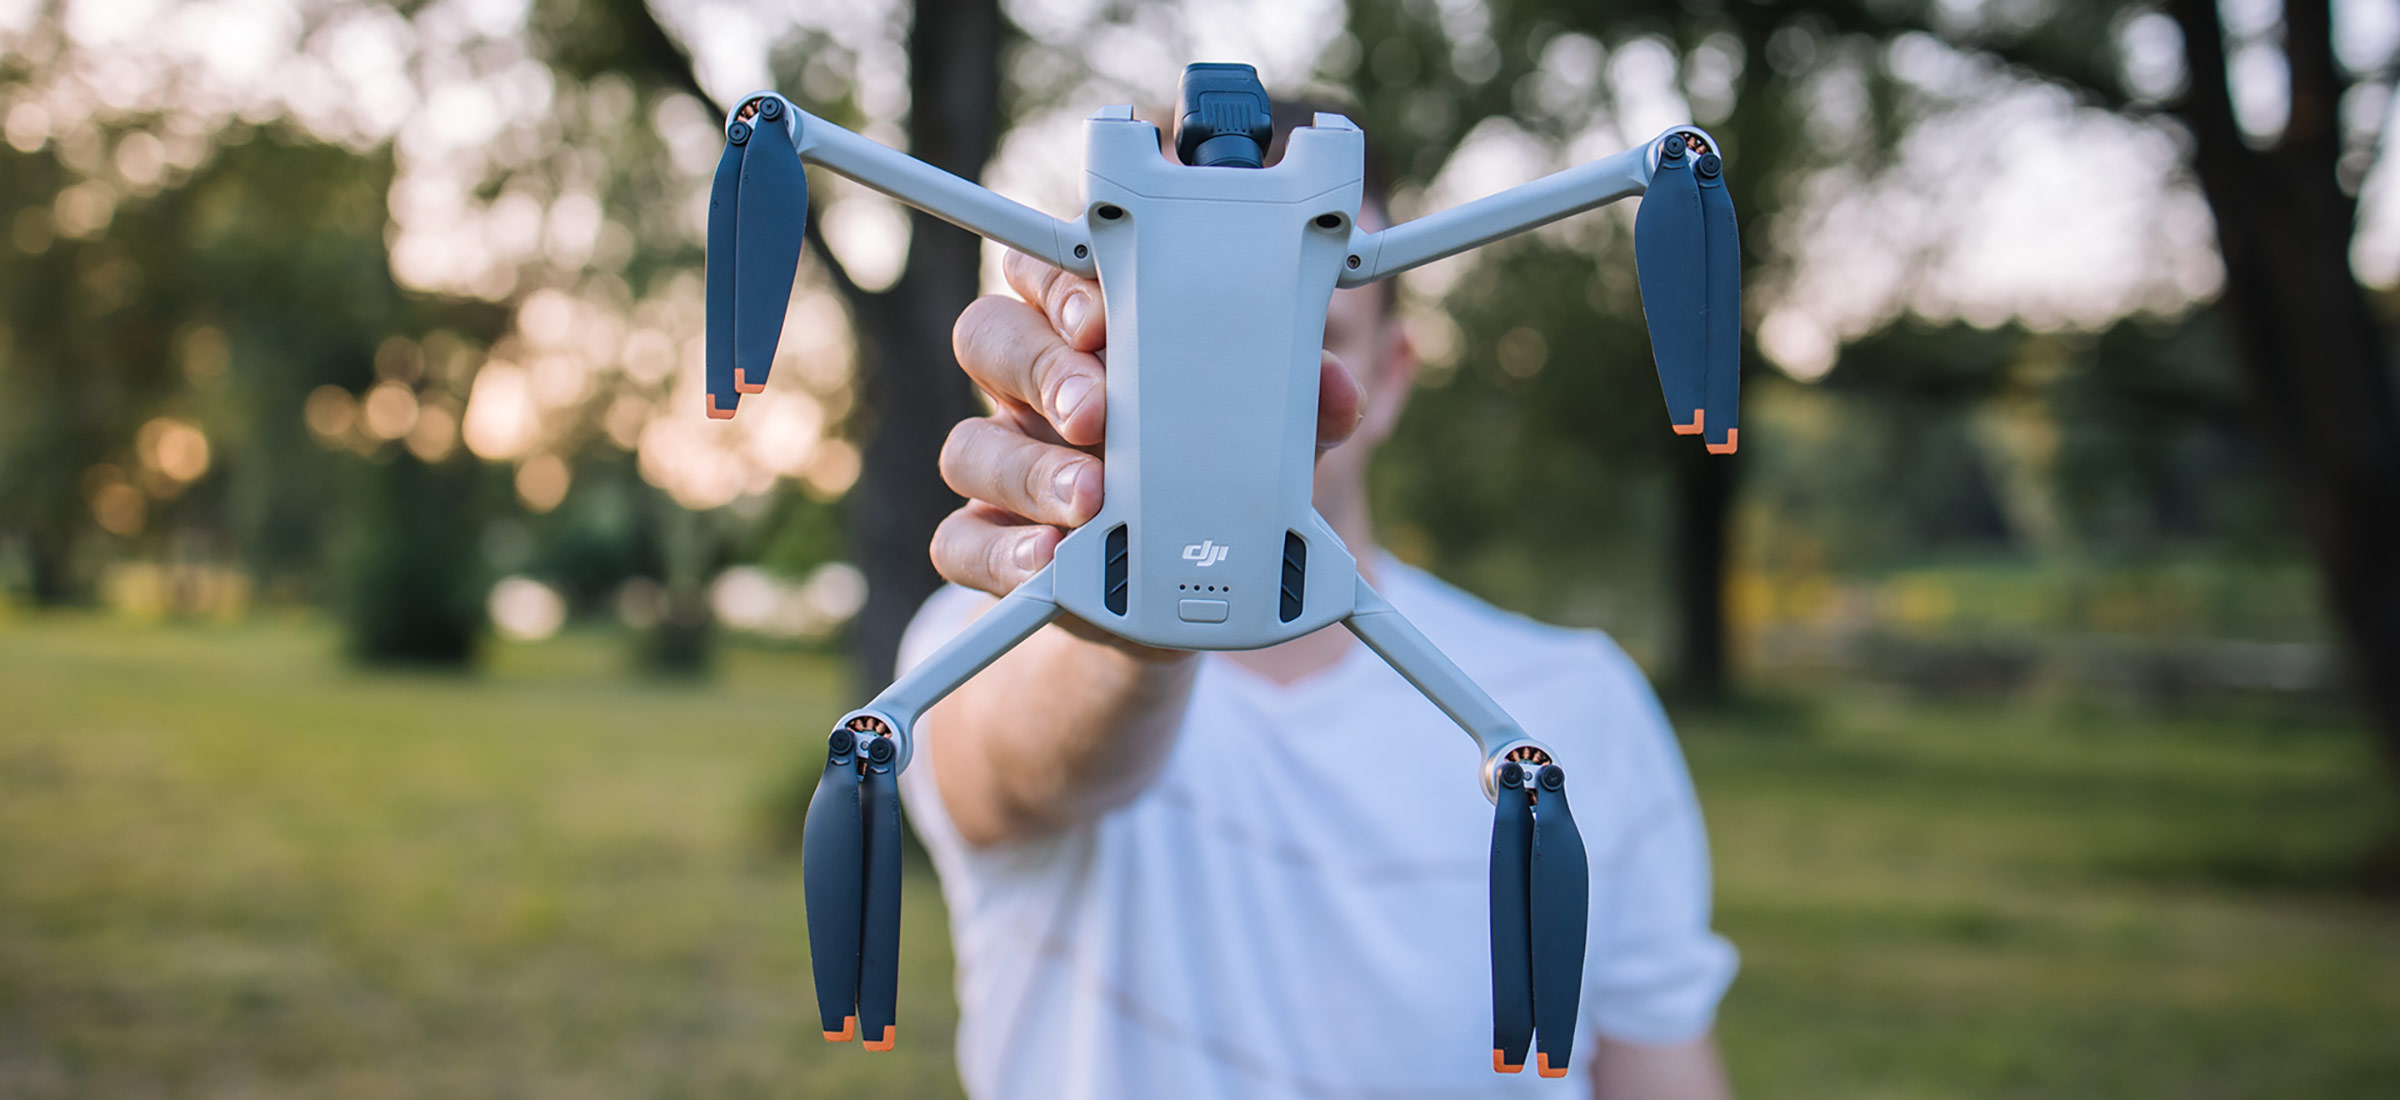
If this is your first time utilizing a drone, DJI, for example DJI Mini 3, you must first download the DJI Fly app to your smartphone/tablet. The maker recommends that the application be downloaded straight from: https://www.dji.com. If you are utilizing the PRO controller, this application should be installed by now. In both cases, you request to get acquainted with it in order to have creative freedom while in the air, and to supply an appropriate safety measurement for drones, yourself and others in the area. The good news is that the application is designed for beginners, making it intuitive and easy to use, but besides allows for very advanced actions if necessary.
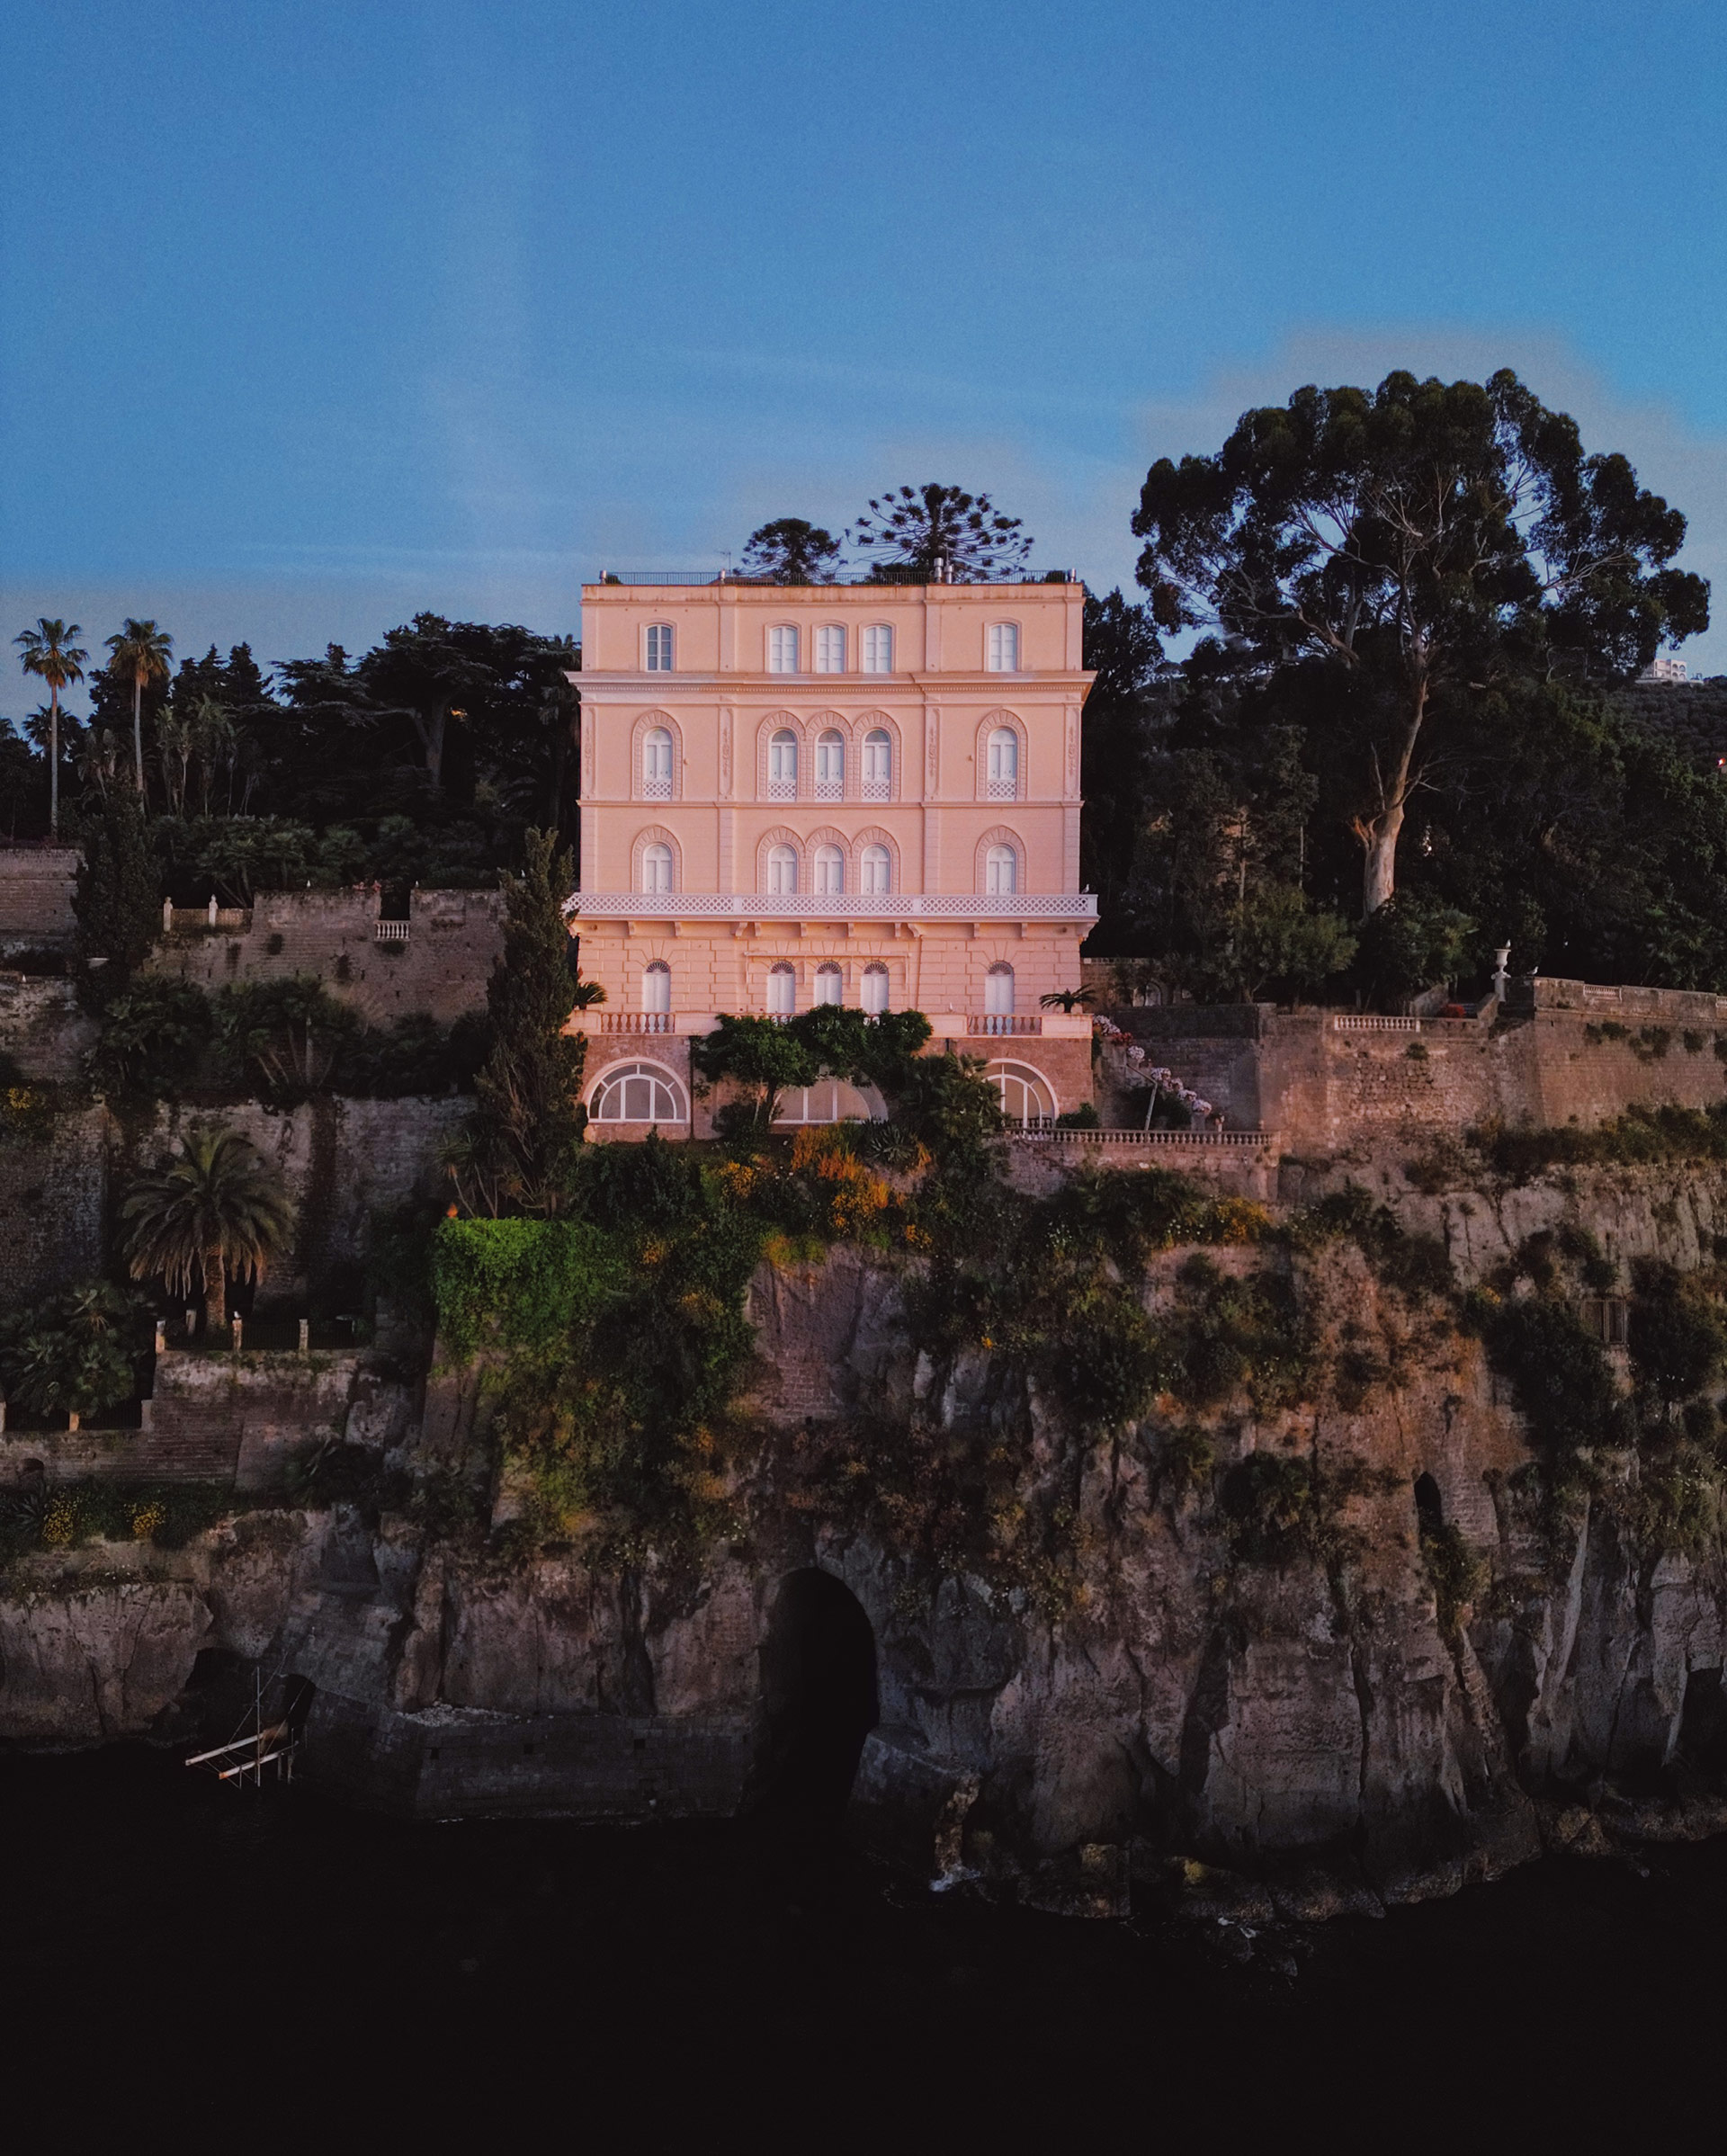
 Photo by Krzysztof Basel
DJI Fly is simply a mobile application developed for DJI drones. Thanks to this application, users can control the drone, evidence videos and take aerial photos. The DJI Fly app offers many features that let you to make interesting and creative films and photos. In the following article, I present any of the most interesting and creative features of this application, which allows you to fly to a higher level.
Before you leave...
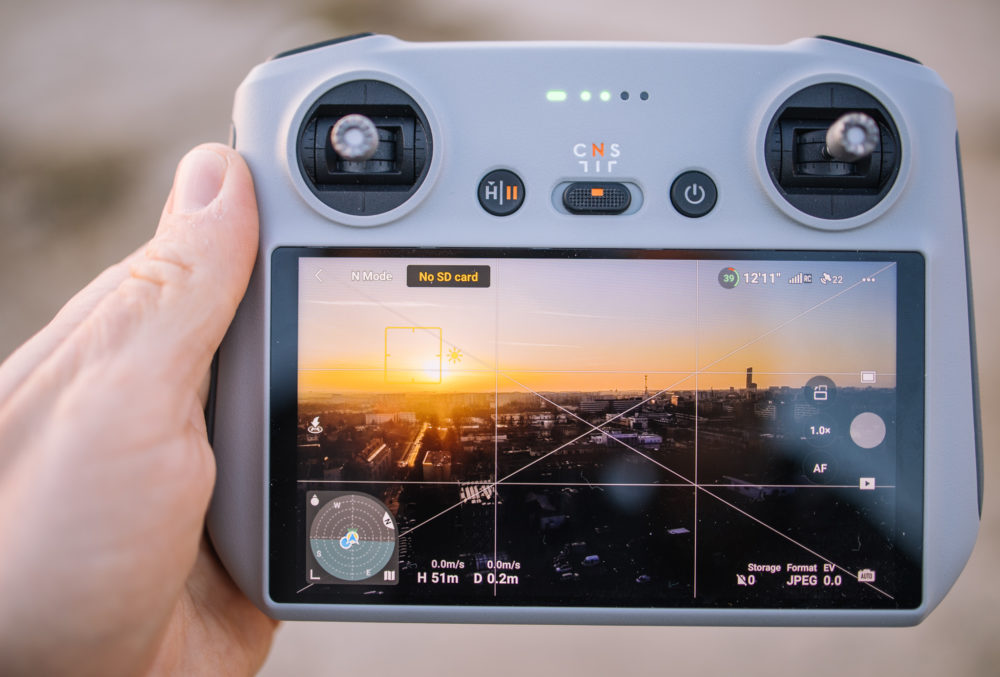
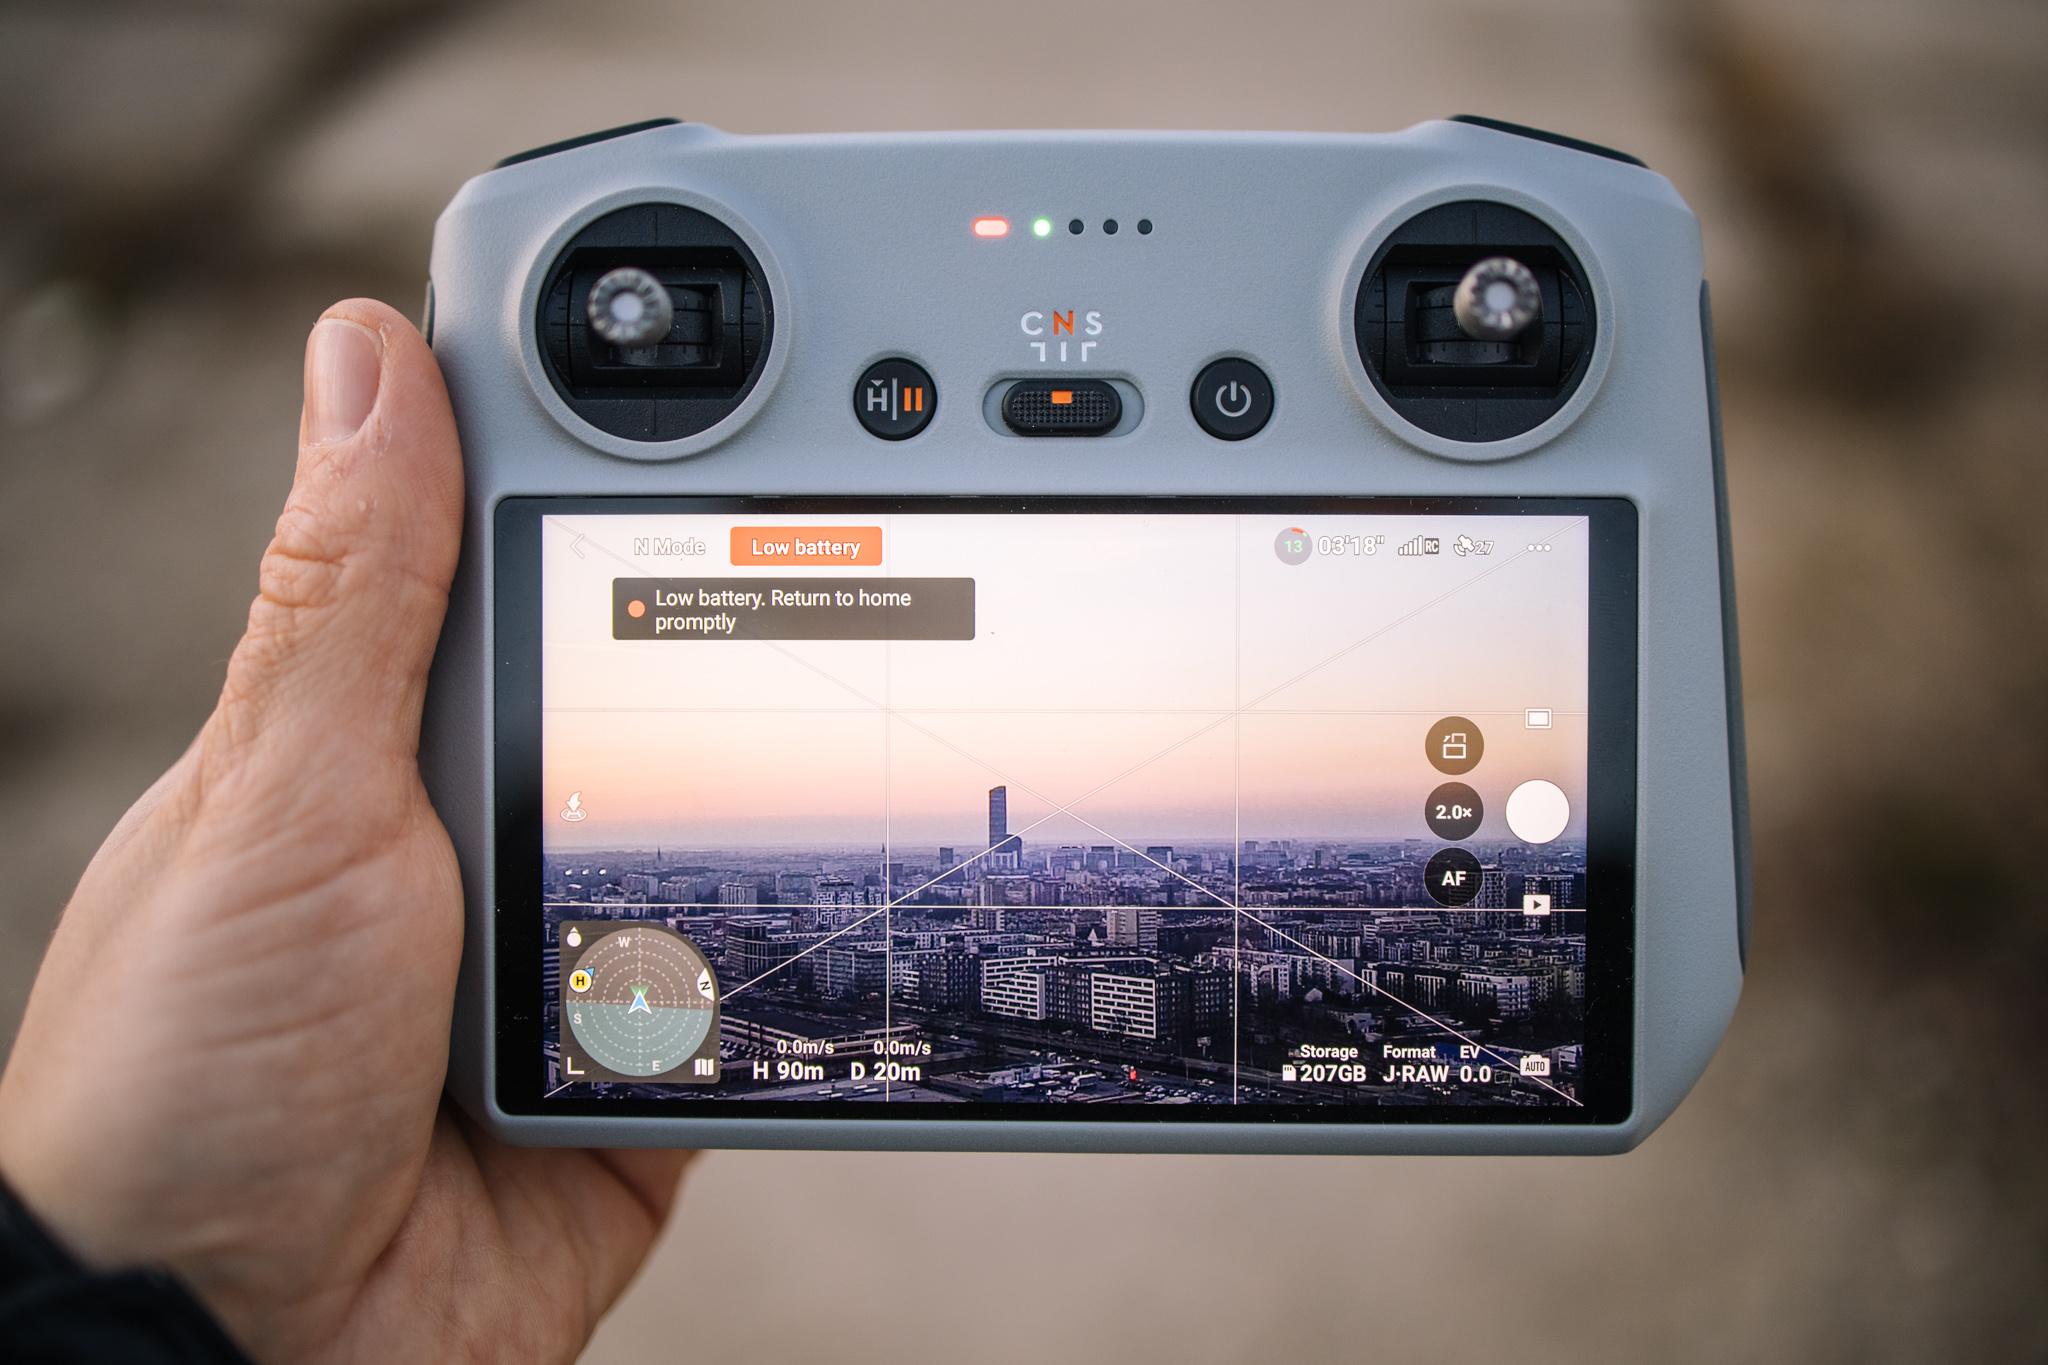
First thing we request to do is pair the drone with the controller. This process is simple, fast, everything happens almost automatically. Then, just run the DJI Fly app, choice the appropriate model of the DJI drone, and your eyes will see about the same screen:
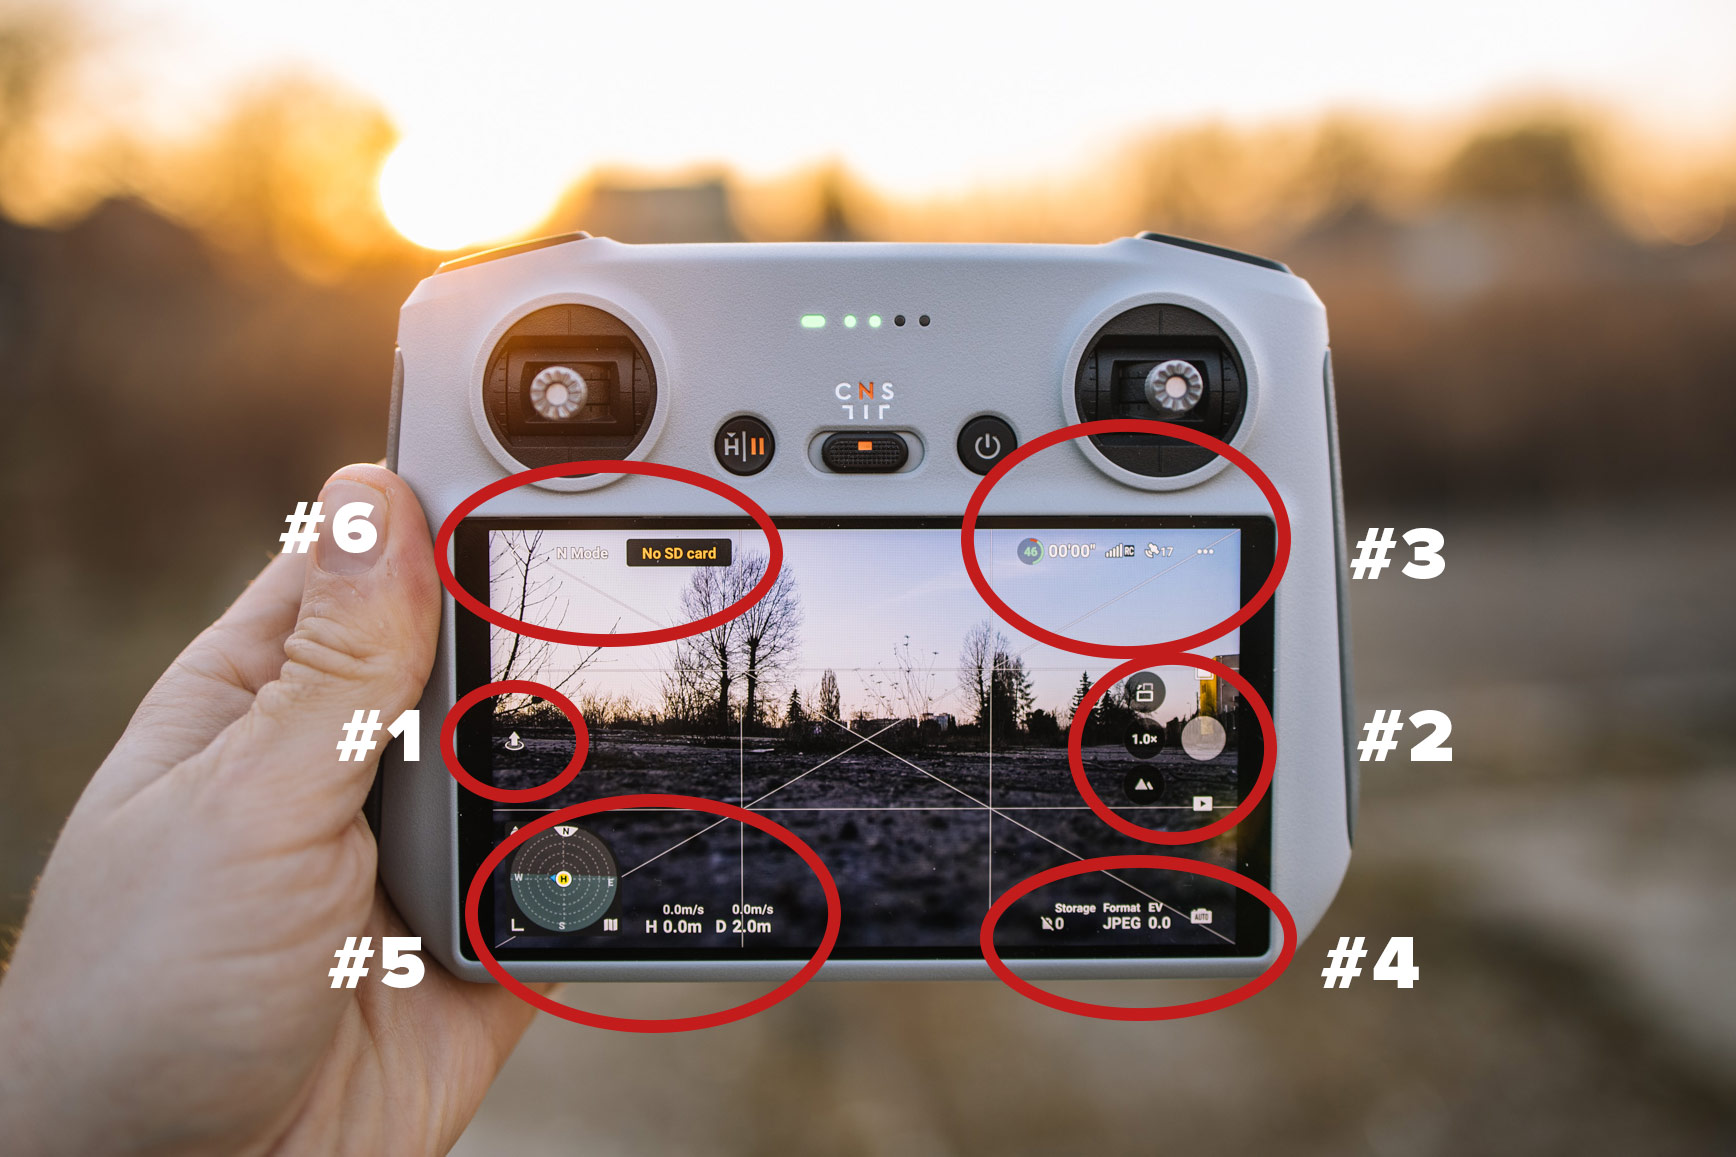
Important parameters and functions are located in the application corners. The 2 most crucial elements, especially for starters, are located on the sides in the middle. Left (#1We have automatic take-off/landing function. To the right (#2) located shutter release, change camera modes, preview images and various camera functions specified as zoom or horizontal/vertical orientation.
In the advanced right corner (#3We have very crucial indicators: from the left percent charge of the drone battery, estimated maximum flight time, signal strength (controller/dron connection), number of satellites connected, and 3 dots, i.e. short for settings. These parameters are worth monitoring on an ongoing basis. Before a drone like DJI Mini 3 can launch, it must connect to at least a few, preferably respective satellites. Then he knows where he is. If you don't want to have problem cutting the image, or stress, that the drone can lose the connection, or the image from the camera, effort to fly so as to have full range, or 4 lines. And of course, the flight time: this 1 can change quickly, depending on the velocity of the flight, the wind, or the manoeuvres you perform. Especially at the beginning, it's good to fly insecurely and return to the landing site erstwhile the percent of charge drops below 30%.
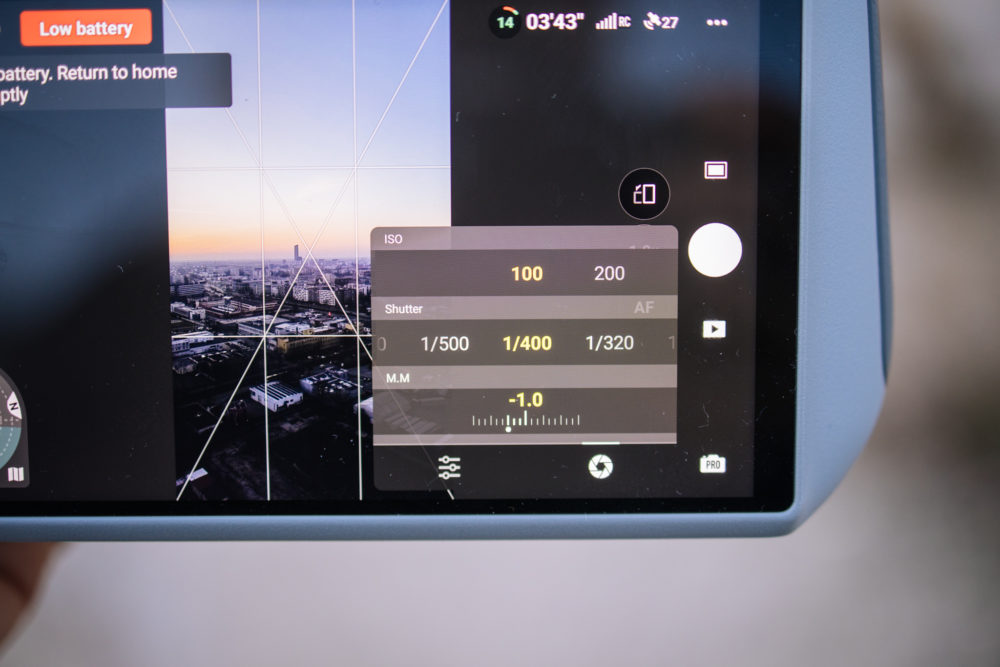
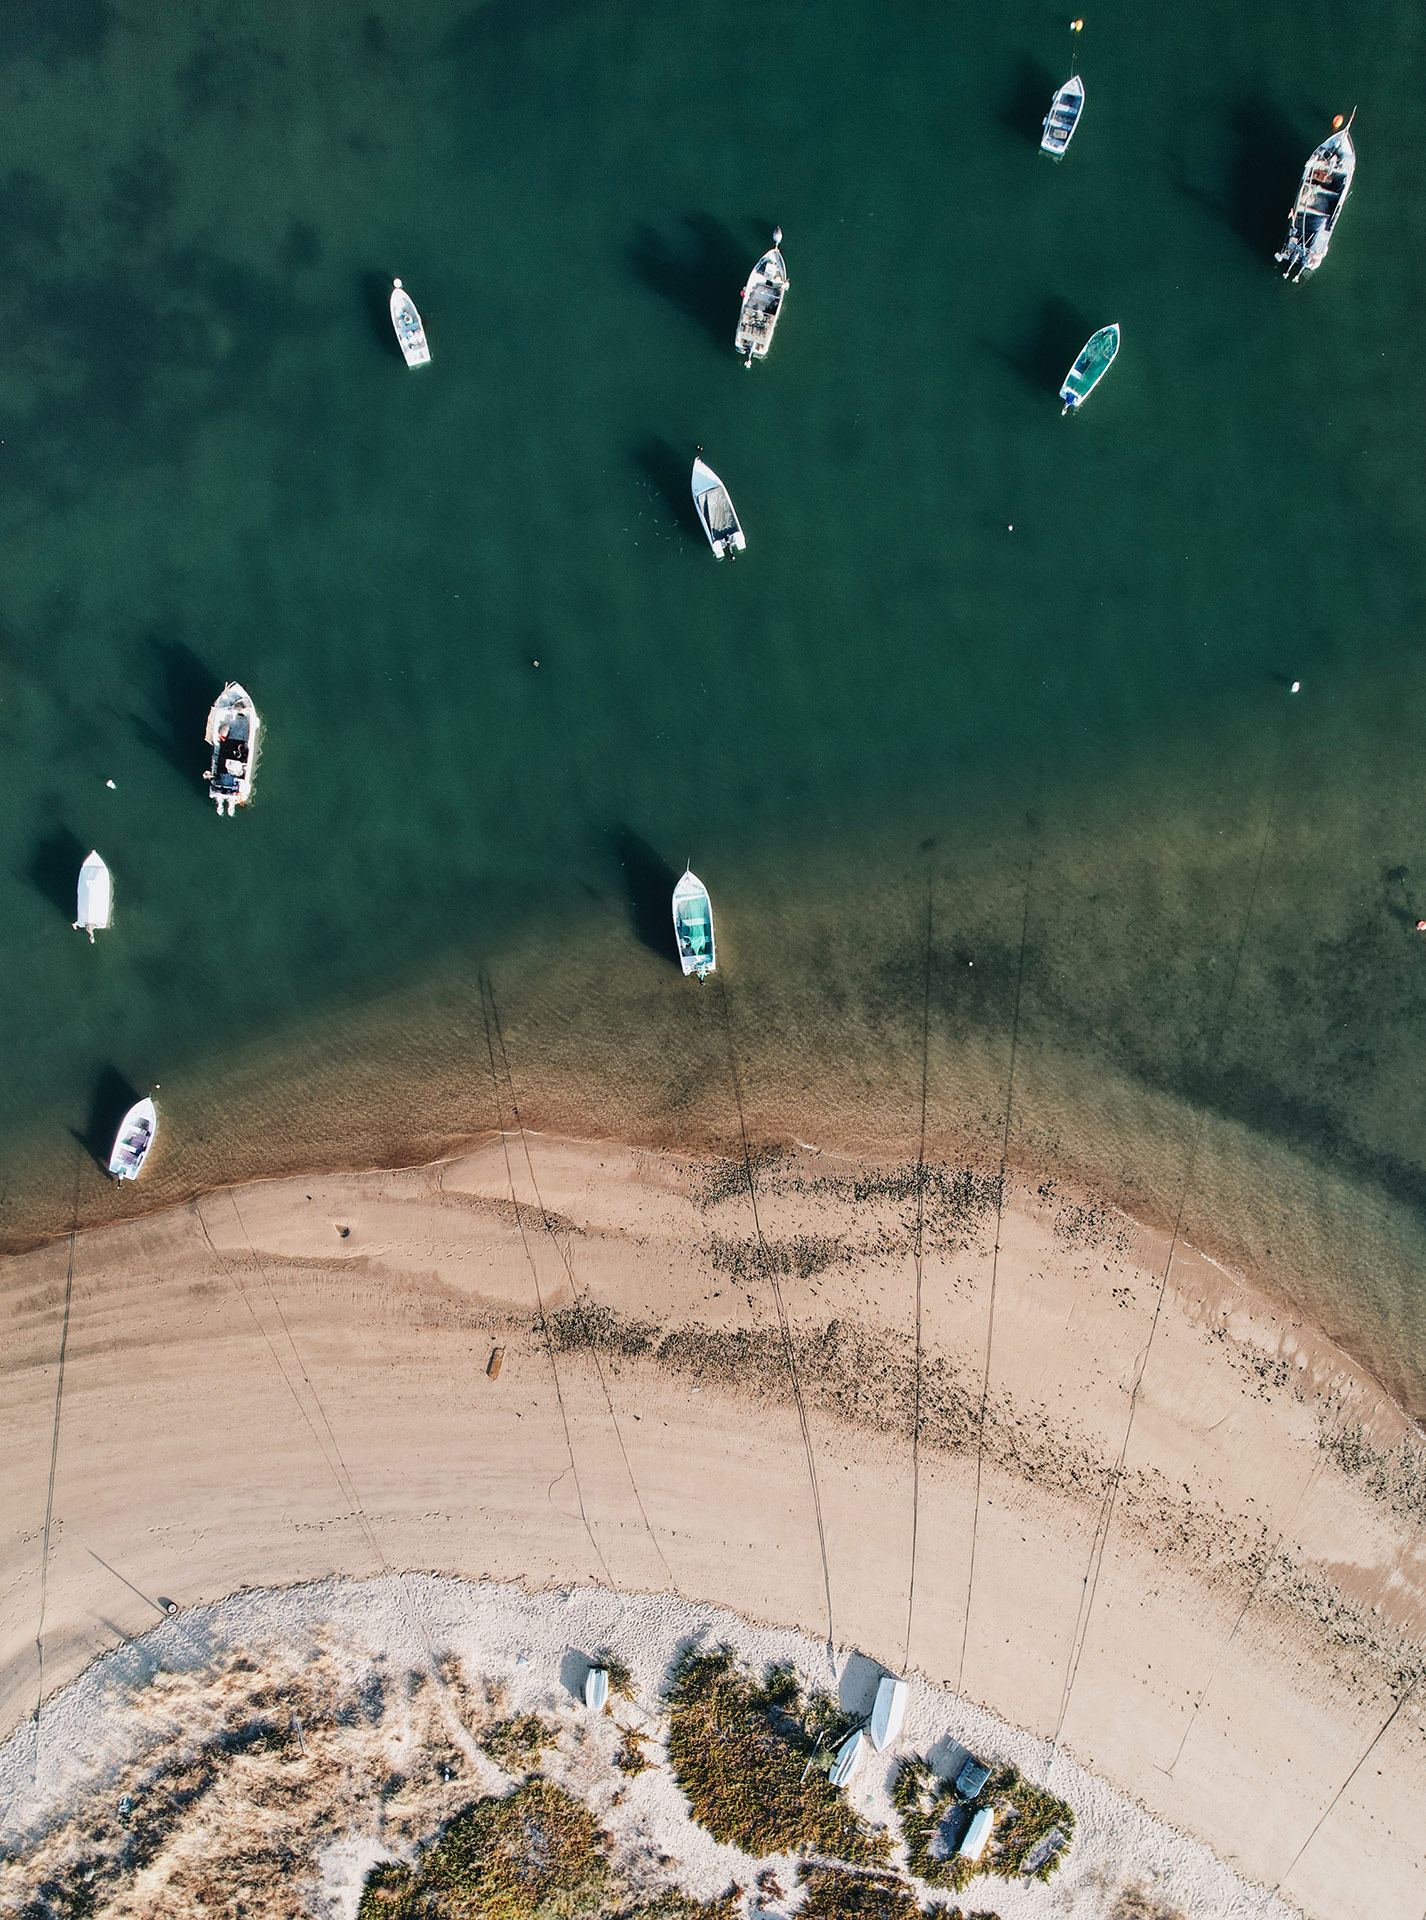 Photo by Krzysztof Basel
Lower right corner (#4) in turn setting camera/camera parameters, auto/manual mode switch, increasingly view how many photos/films, we can perform. Being at the beginning of your drone road, you will most likely choose the car mode, which usually works very well. I take pictures in this mode myself often, and I turn on manual settings erstwhile conditions are dense and I like to change any parameters myself.
Moving on, we have the lower left corner (#5) and there are 2 very crucial parameters: height and distance of the drone from the starting point. It is worth keeping an eye on both, due to the fact that legally, we are limited to not flying besides advanced or far. Right here, we'll find a drone locator and a tiny map. Just click this item to open a large map. Sometimes a map can be useful, especially if we get lost and don't know where to fly to go home.
Left mountain corner (#6) in turn return arrow, i.e. exiting the image view mode. I advise you not to do this on the flight, but if you do, you can come back and have your camera view back. In this part of the screen there are besides various messages.
It's a pill of cognition that quickly, allows you to realize what's going on in the DJI Fly app. erstwhile we've figured it out, it's worth going deeper and utilizing interesting creative features.
DJI Fly – functions that will change drone flying
Return-to-Home function – we start with a function that improves safety. Return-to-Home allows you to automatically return the drone to the starting point, in case of failure of signal or low battery level. This allows you to avoid losing drones or dangerous situations in the air when, for example, we get lost and do not know which direction to fly. This mode will besides run automatically erstwhile we run out of battery or lose the GPS signal.

Change image and movie parameters
Auto mode in the camera or camera drone is cool, especially at the beginning, but sometimes it is worth experimenting and choosing your own parameters. Especially in video mode. By clicking the icon in the bottom right corner of the application, you will gain access to the anticipation to change the resolution and the colour of the video. Overall, the higher the resolution, the better the quality, and the image is more detailed. In turn, the cage is the number of frames per second that the camera records. Standard for the image to be liquid, we choose 24 kl/s.
Higher cages, let you to get a more fluid image, but also, let you to slow down the image at the postproduction stage. And by choosing 60 kl/s, you can slow the video twice. More advanced drones, they're 120 kl/s (DJI Mini 3 Pro) and even as many as 240 cl./s (DJI Air 2S, DJI Mavic 3 Pro). So heavy released the image opens up completely fresh creative possibilities!
Panorama
Sometimes the view on the top is so large that a simple image is not enough. Then it is worth trying to take panoramic pictures. You won't gotta fold anything, decision the drone, combo in Photoshop: just choice the right mode and drone, even basic as DJI Mini 3, will execute a beautiful panorama for you. Enter camera mode and then choice pano. Dp selection will be as many as 3 different panorama modes: classic, wide (Wide) and 360-degree or alleged planet photos. After selecting the appropriate version, the drone will execute a series of images, changing the camera's position and then connecting the cages so done, into one. It's as simple as that. On your side is just to find a beautiful view, worthy of specified a spectacular photo!
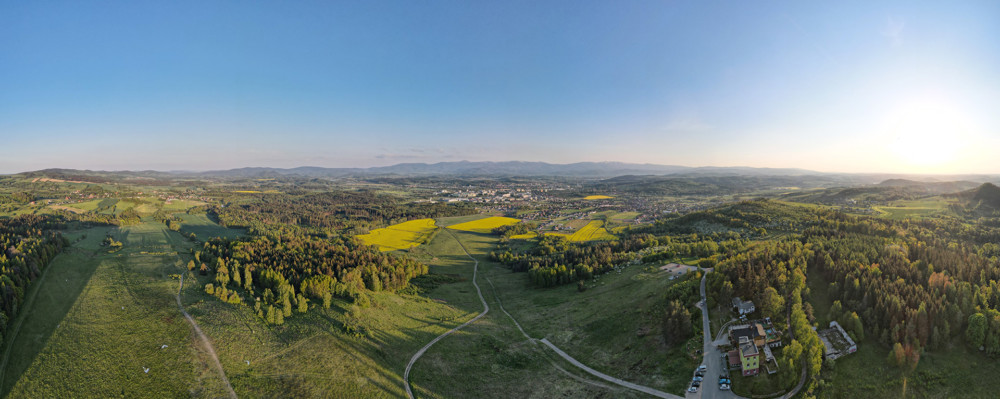 A specified panorama
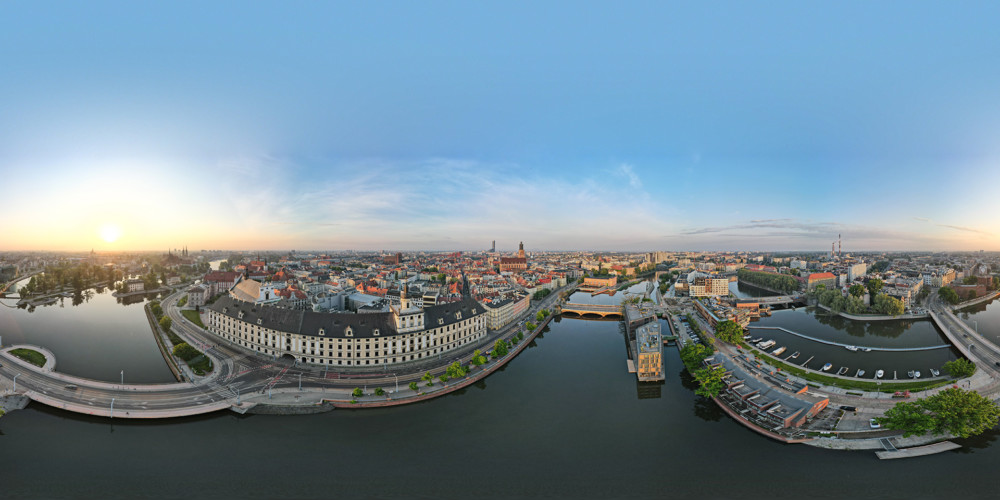 Wide Panorama
Quickshots
You know those fancy movie footage I put on social media? You know, erstwhile a drone leaves a individual or follows her, it spins around her? Most, like all of them, were created thanks to Quickshots mode in DJI drones. Thanks to her, you don't gotta have quite a few drone skills to make spectacular aerial footage. erstwhile the video is finished, the DJI Fly app will automatically make a short video that will be ready for instant release on social media.
The QuickShots feature has respective modes of operation, although not in each drone, all of them are available:
- Drone: summertime classic. The drone itself flies backwards and rises with a camera locked on the object, which is us.
- Circle: The drone itself orbits the selected object.
- Rocket: The drone rises and spirals with a camera pointing at the object lowers the ceiling.
- Boomerang: The drone orbits the object with slow motion, rising during flight from the starting point and lowering the ceiling on return. The drone's starting point forms 1 end of the long oval axis, while the another end is on the other side of the object.
- Asteroid: The drone flies backwards and forward, taking a series of pictures. He then returns to the starting point. The generated video starts with a panoramic view from the highest point and then shows a view from above.
- Dolly Zoom: Mavic 2 Zoom flies backwards and forwards. In Dolly Zoom mode, the approximation is adjusted during the flight to keep the selected object in the same place while the second plan changes.
Active Track
ActiveTrack is simply a feature available in DJI drones that allows automatic tracking and recording of moving objects specified as people, vehicles or animals. This allows drone users to make dynamic aerial videos that track and evidence moving objects from different angles. We can do this without specialist drone operations.
ActiveTrack functions with advanced imagination algorithms and sensors that let you to track moving objects and keep adequate distance and position. This function is available in drones with sensors located on respective sides of the device.

ActiveTrack is peculiarly useful erstwhile creating action, sports, documentaries and another videos where the moving object is key. Thanks to this feature, you can make dynamic bird-eye videos that will stand out against others.
Vertical cuts
The latest DJI drones, like DJI Mini 3, let you to photograph and evidence vertically. This is simply a very popular format, which allows you to frame shots ready for sharing in relationships, rolls or TikTok. The camera's orientation icon is right next to the trigger: on the right edge, about in the middle.
Changes in vulnerability level
If the shot is besides bright or dark, simply point to the point on the screen where the application is to measurement the light. This will frequently help, but additionally, we can smoothly adjust the vulnerability level by moving the icon of the sun up and down. Very much like the smartphones. A simple thing, and how useful!
Simple editing of photos and films
One of the fresh updates to the DJI Fly app, has brought a fresh quality to editing photos and videos. Now, shooting, editing and sharing can be done in the application. Users can besides easy manage memory, thanks to the ability to export or delete video material straight in the application.
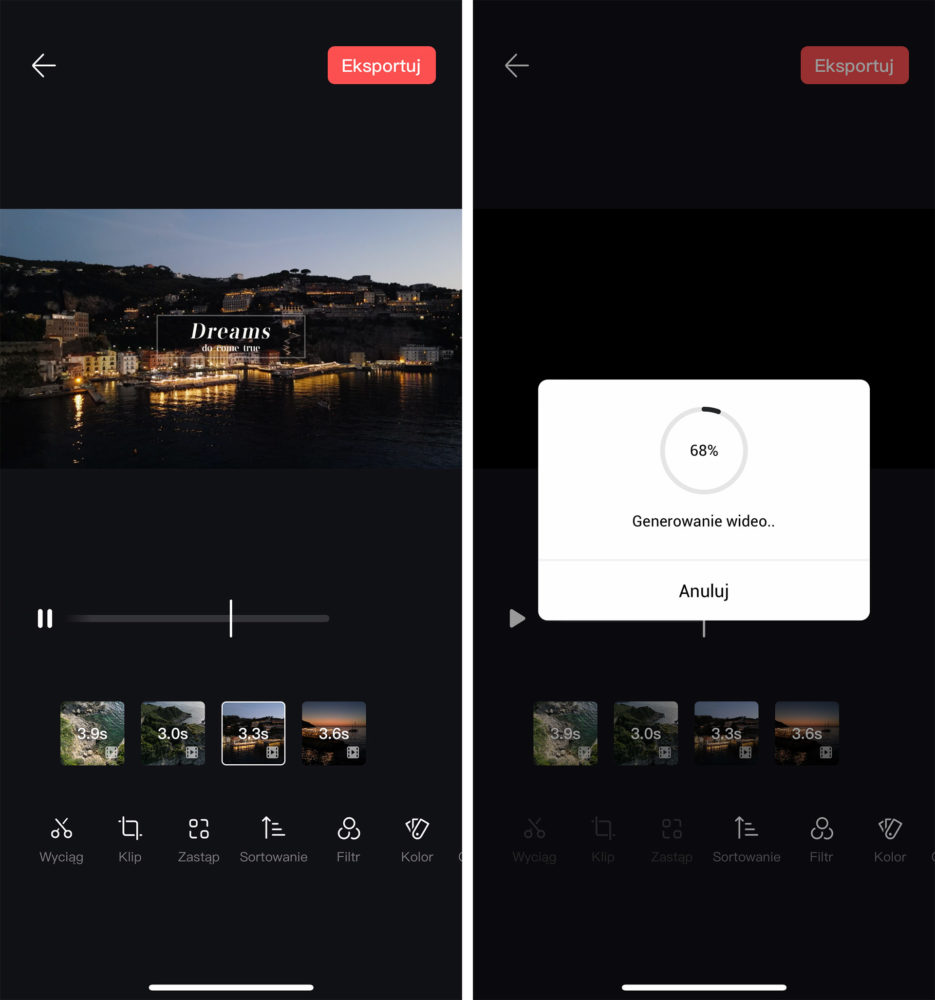
The fresh editor is simpler to use, but besides contains many templates, music backings, peculiar effects and another accessories. This all makes it easier and faster to make short films, add effects, subtitles, or music, or take pictures. Intuitive timelines let flexible and precise editing of video material. The fresh editor besides supports switching between vertical and horizontal orientation, allowing you to shoot and edit in the way you prefer.

QuickTransfer
If you connect to a drone via a controller with an integrated screen and an full system, you may wonder how to download photos and videos on your smartphone. With aid comes QuickTransfer. simply install the DJI Fly app on your mobile device, enter the Album tab, and choice the lightning icon in the advanced right corner.
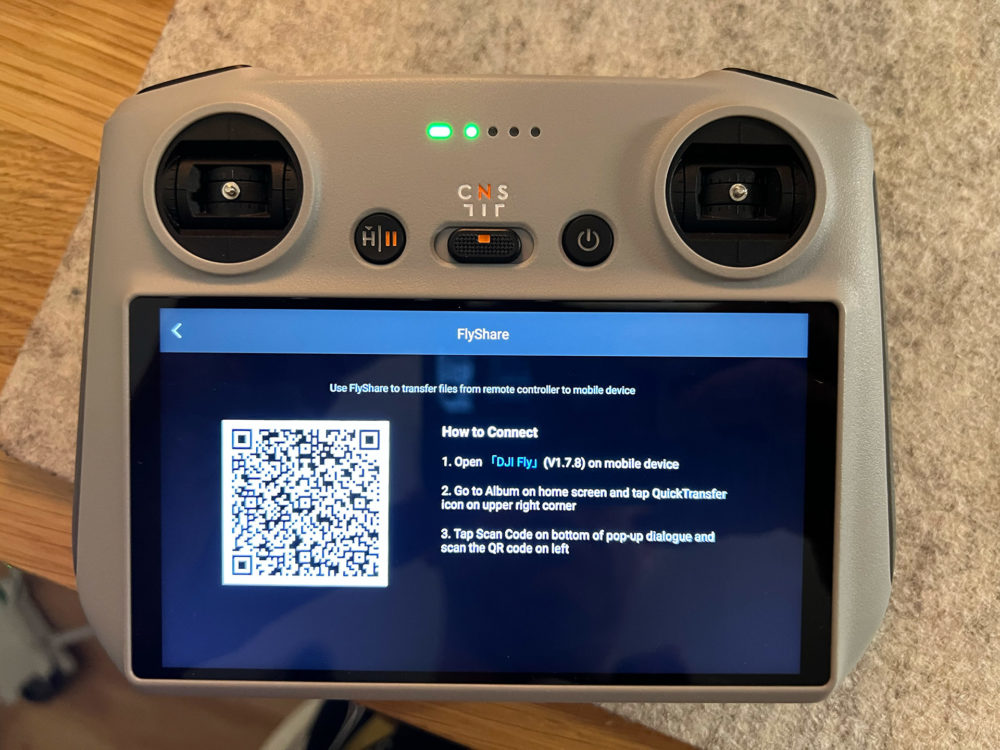
The same steps must be done in the controller, only there we have an icon with controller and lightning. The controller will then display the manual and QR code. Scan the QR code for the smartphone and it'll connect to the controller immediately.
QuickTransfer is especially useful erstwhile you want to upload files from a drone to your smartphone or tablet in the field without access to your computer. Thanks to this, you can easy and rapidly view materials that have been made with a drone, and make them available on social media or another applications.
It is besides worth noting that QuickTransfer is very fast and allows you to upload large video files and photos in seconds.
DJI Fly – advanced features you will appreciate later
Using flat profile in video
DJI drones give a truly cool video picture, but if we want to get to the higher level of movie recording, it is worth taking a look at the flat D-Log colour profile. By choosing it on the main menu, the camera will evidence a color-extended image that looks grey and gloomy, but thus allows for much greater possibilities of post-production of colour due to the fact that it records more data.
Setting the Return Point
The Home Point is set automatically erstwhile the drone connects to the satellites. This is where the device will return automatically if you lose the connection to it. It's all good if you're in this place all the time. However, there are situations erstwhile you travel erstwhile you fly or even drive a car or sail a boat. Imagine what happens if the drone returns to where you came from, and now you're in another part of the lake...
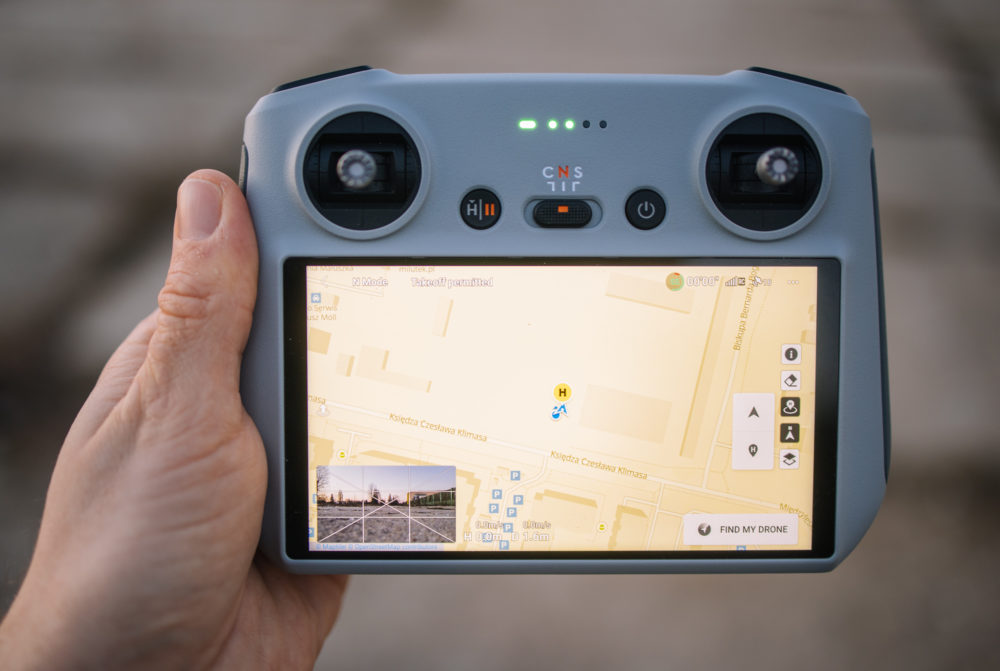
So it is worth to think about this in advance. Fortunately, we can manually set Home Point. This can be done e.g. by switching to a map view, then clicking the H-letter icon on the pin.
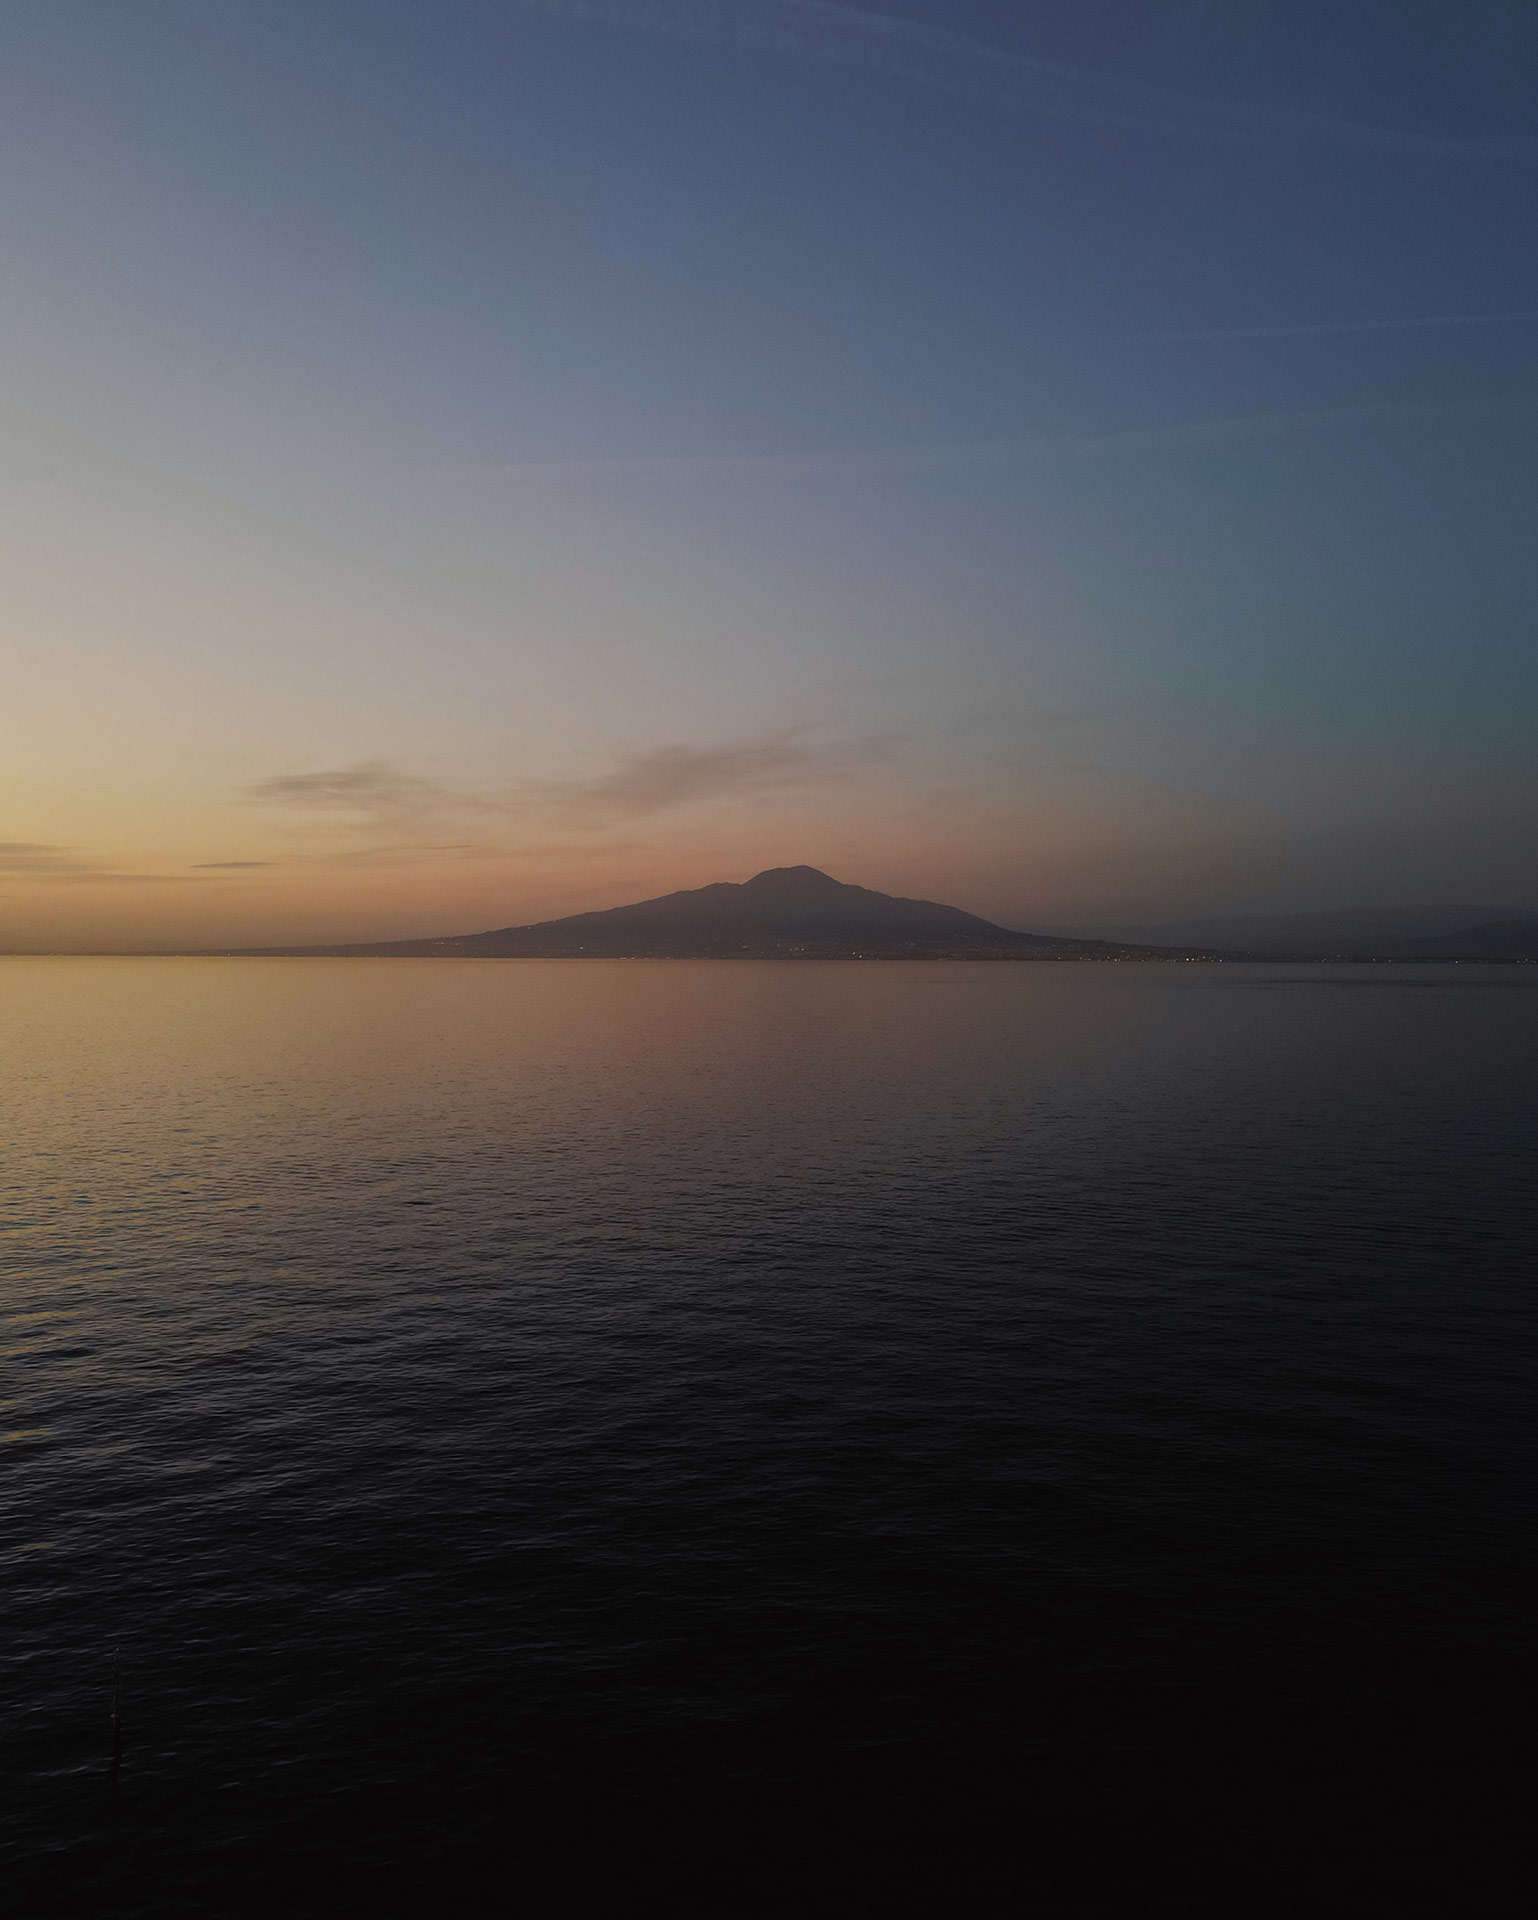 Photo by Krzysztof Basel
Enable Air Sense
The Air Sense strategy uses aviation technology known as ADS-B to receive signals from close aircraft and helicopters and display their position on the drone pilot's control screen. As the planes approach the drone, AirSense will inform the drone pilot with messages, sounds and vibrations to land safely. This is simply a large and useful feature that should be included in the main menu if our drone is equipped with it.
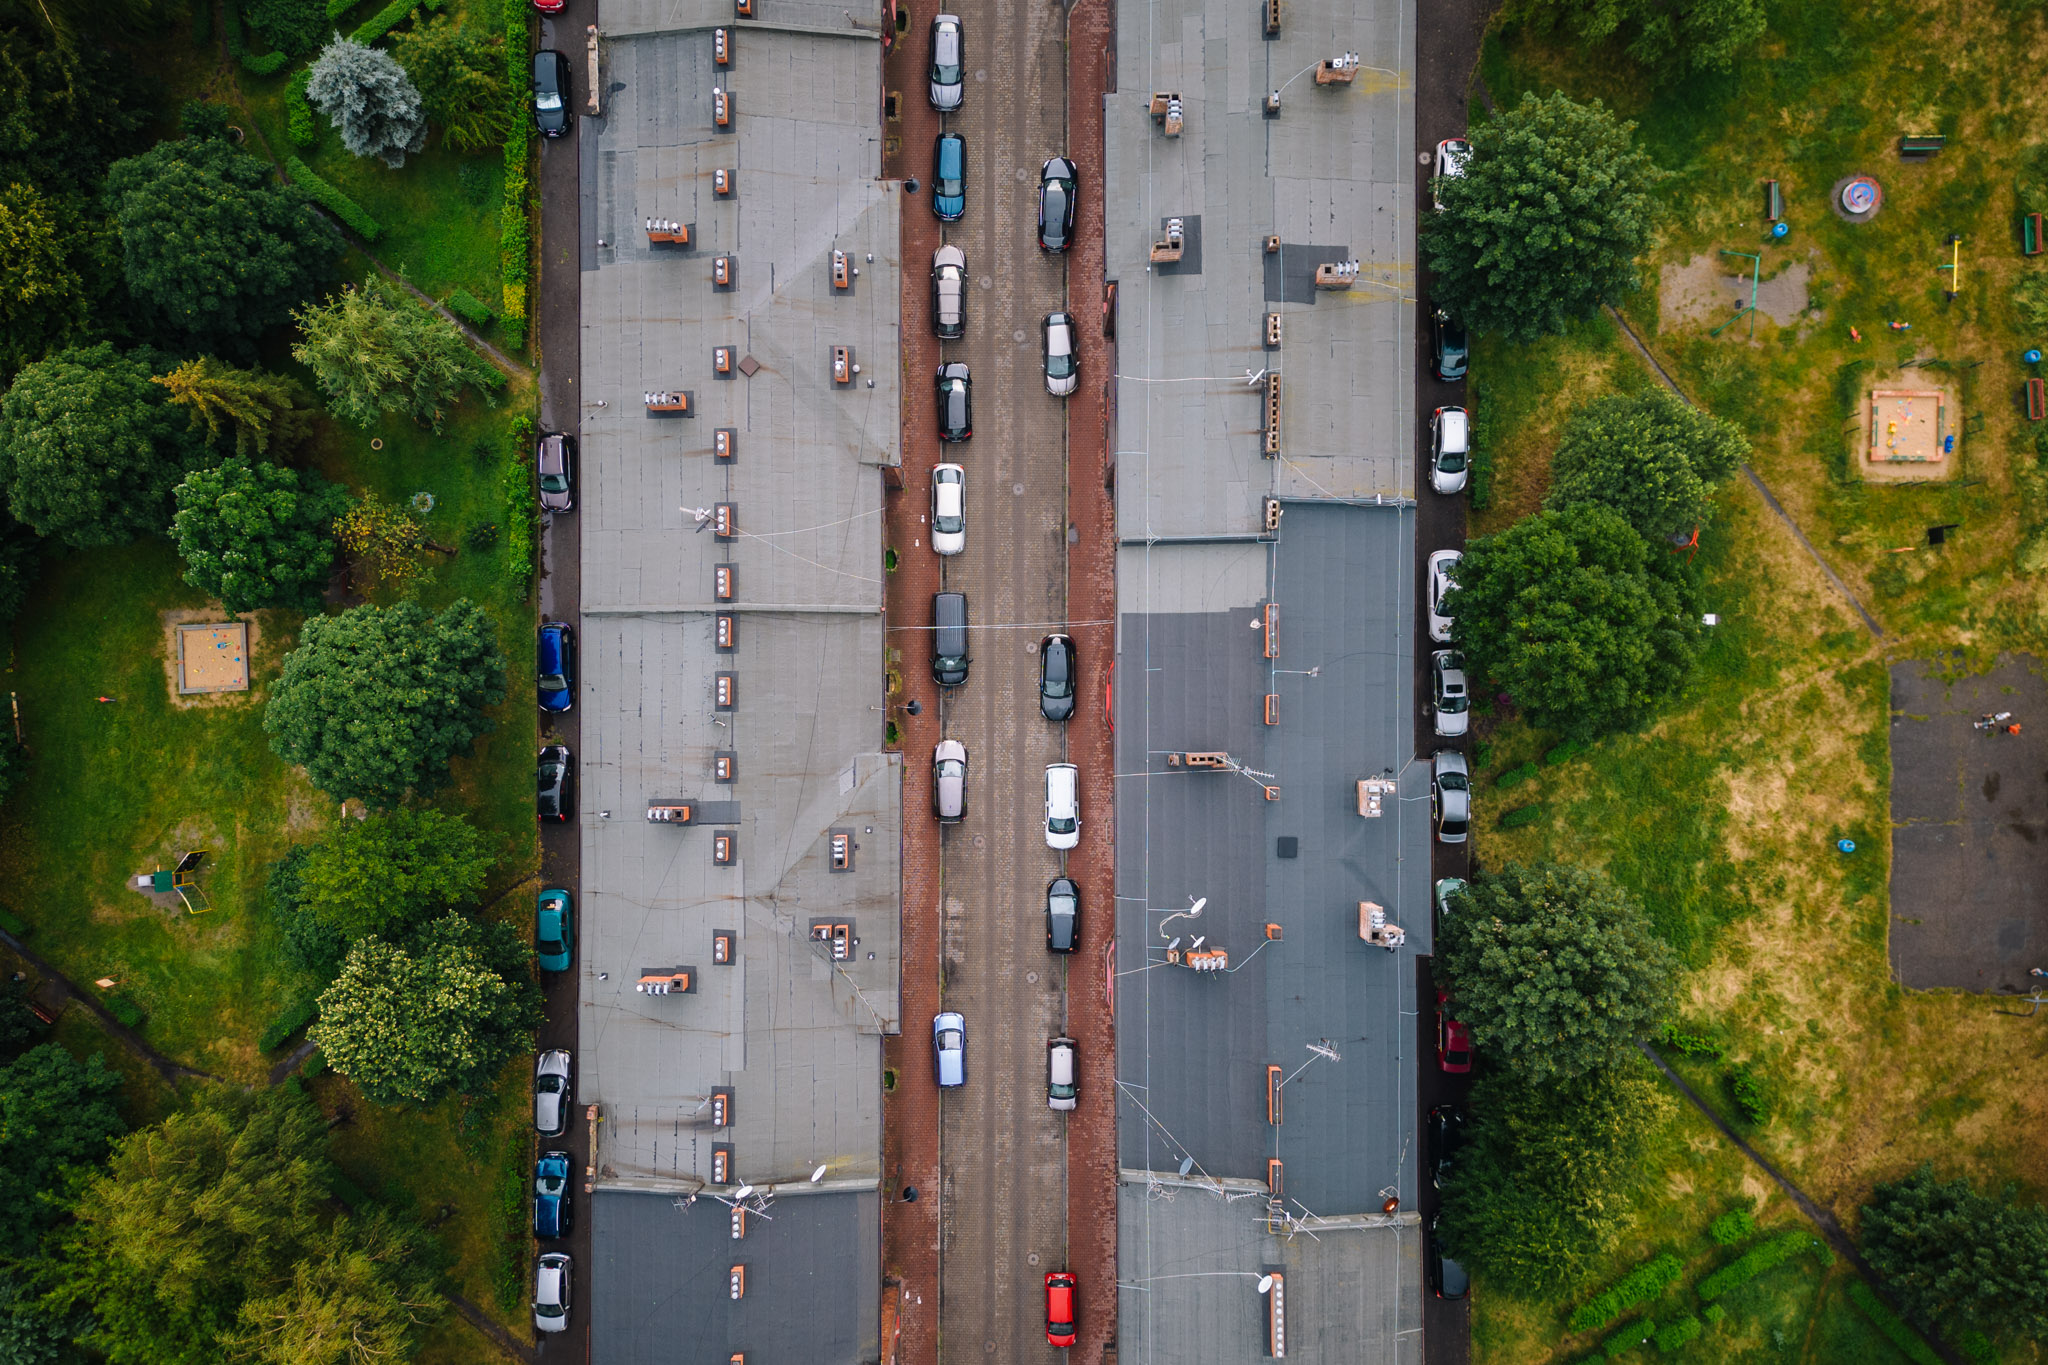 Photo by Krzysztof Basel
Additional aid with photos and videos
DJI drones offer a full bunch of different accessories to aid us make shots. I frequently usage an x-ray, histogram, or auxiliary line informing myself. We can turn them on/off in the main menu, in the "Camera" tab.
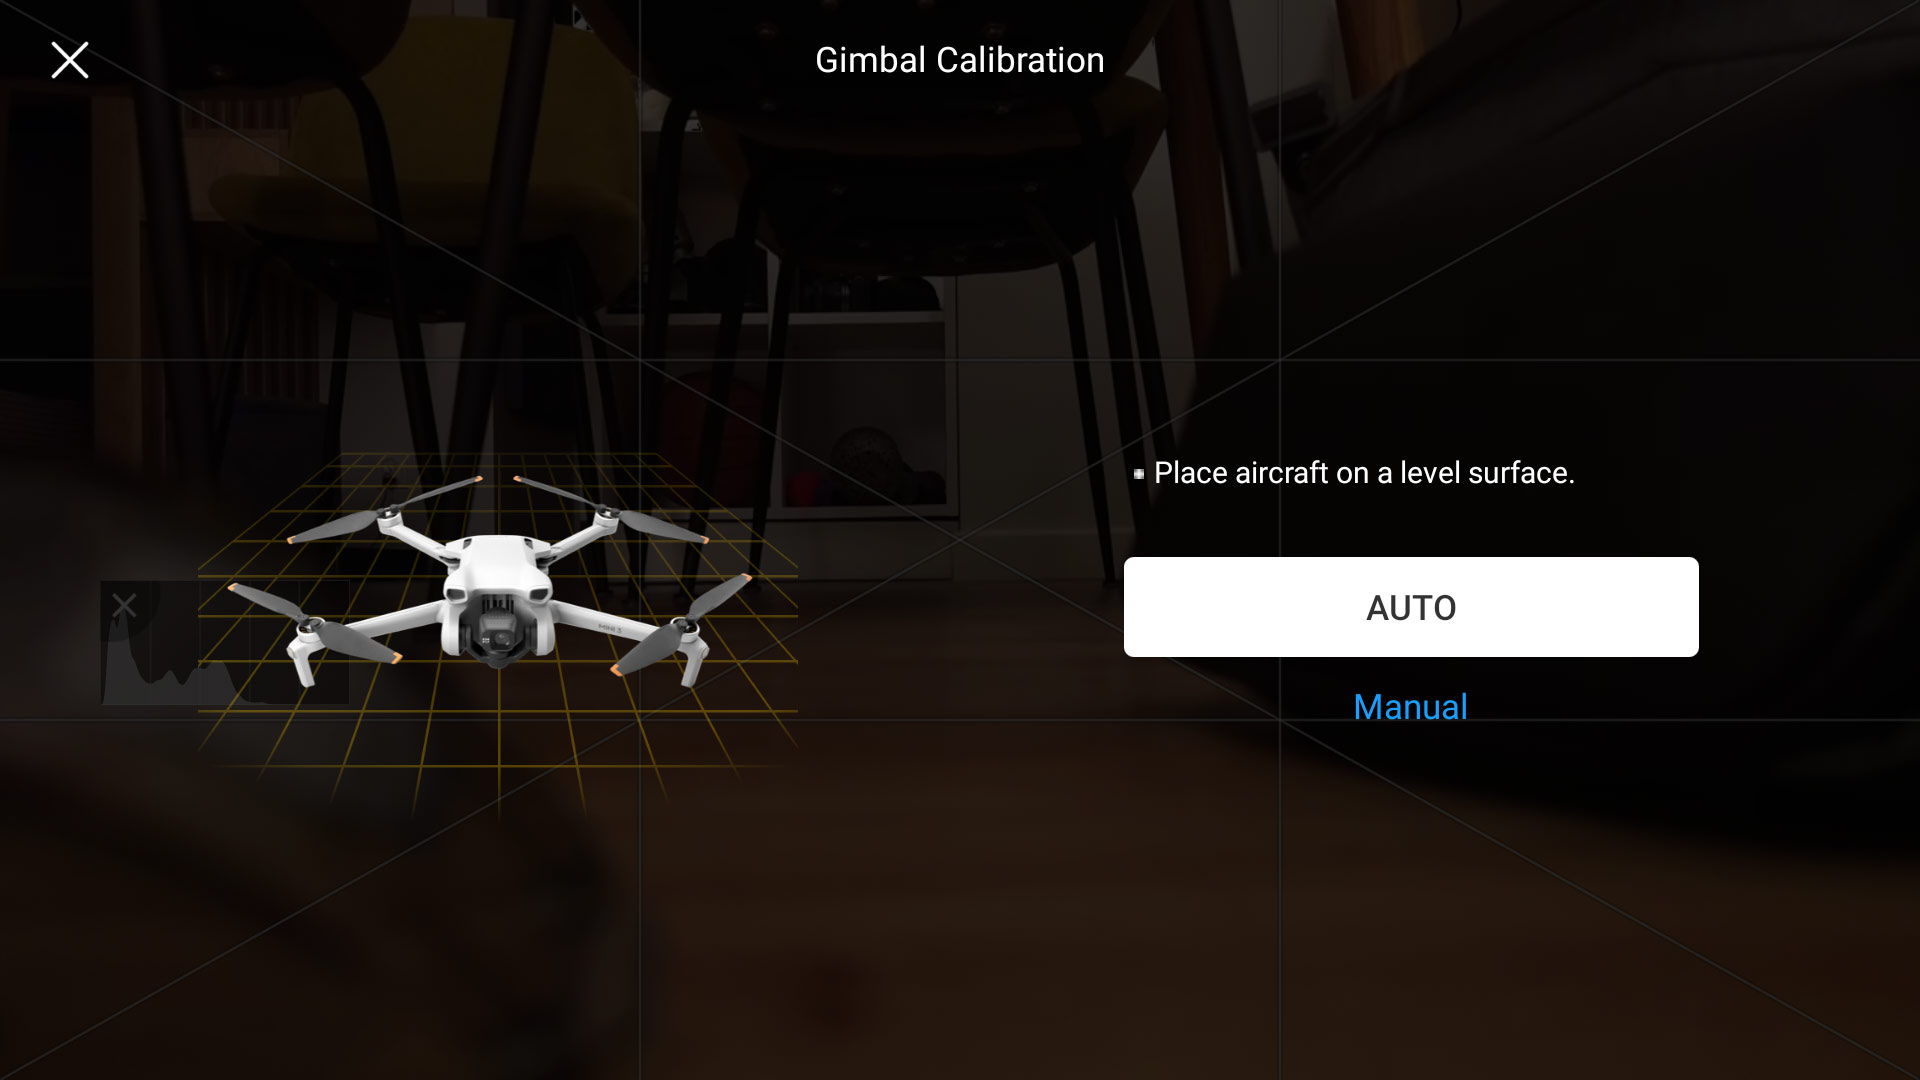
Calibration and adjustment of gimbal sensitivity
When we get a small freedom in flying, it's worth playing with gimbal settings. Even in the simplest models, we have the ability to set it with speed, motion fluidity, or maximum angular velocity and besides calibrate it. You will find them in the “Camera” tab > “Gain & Expo Tuning”.
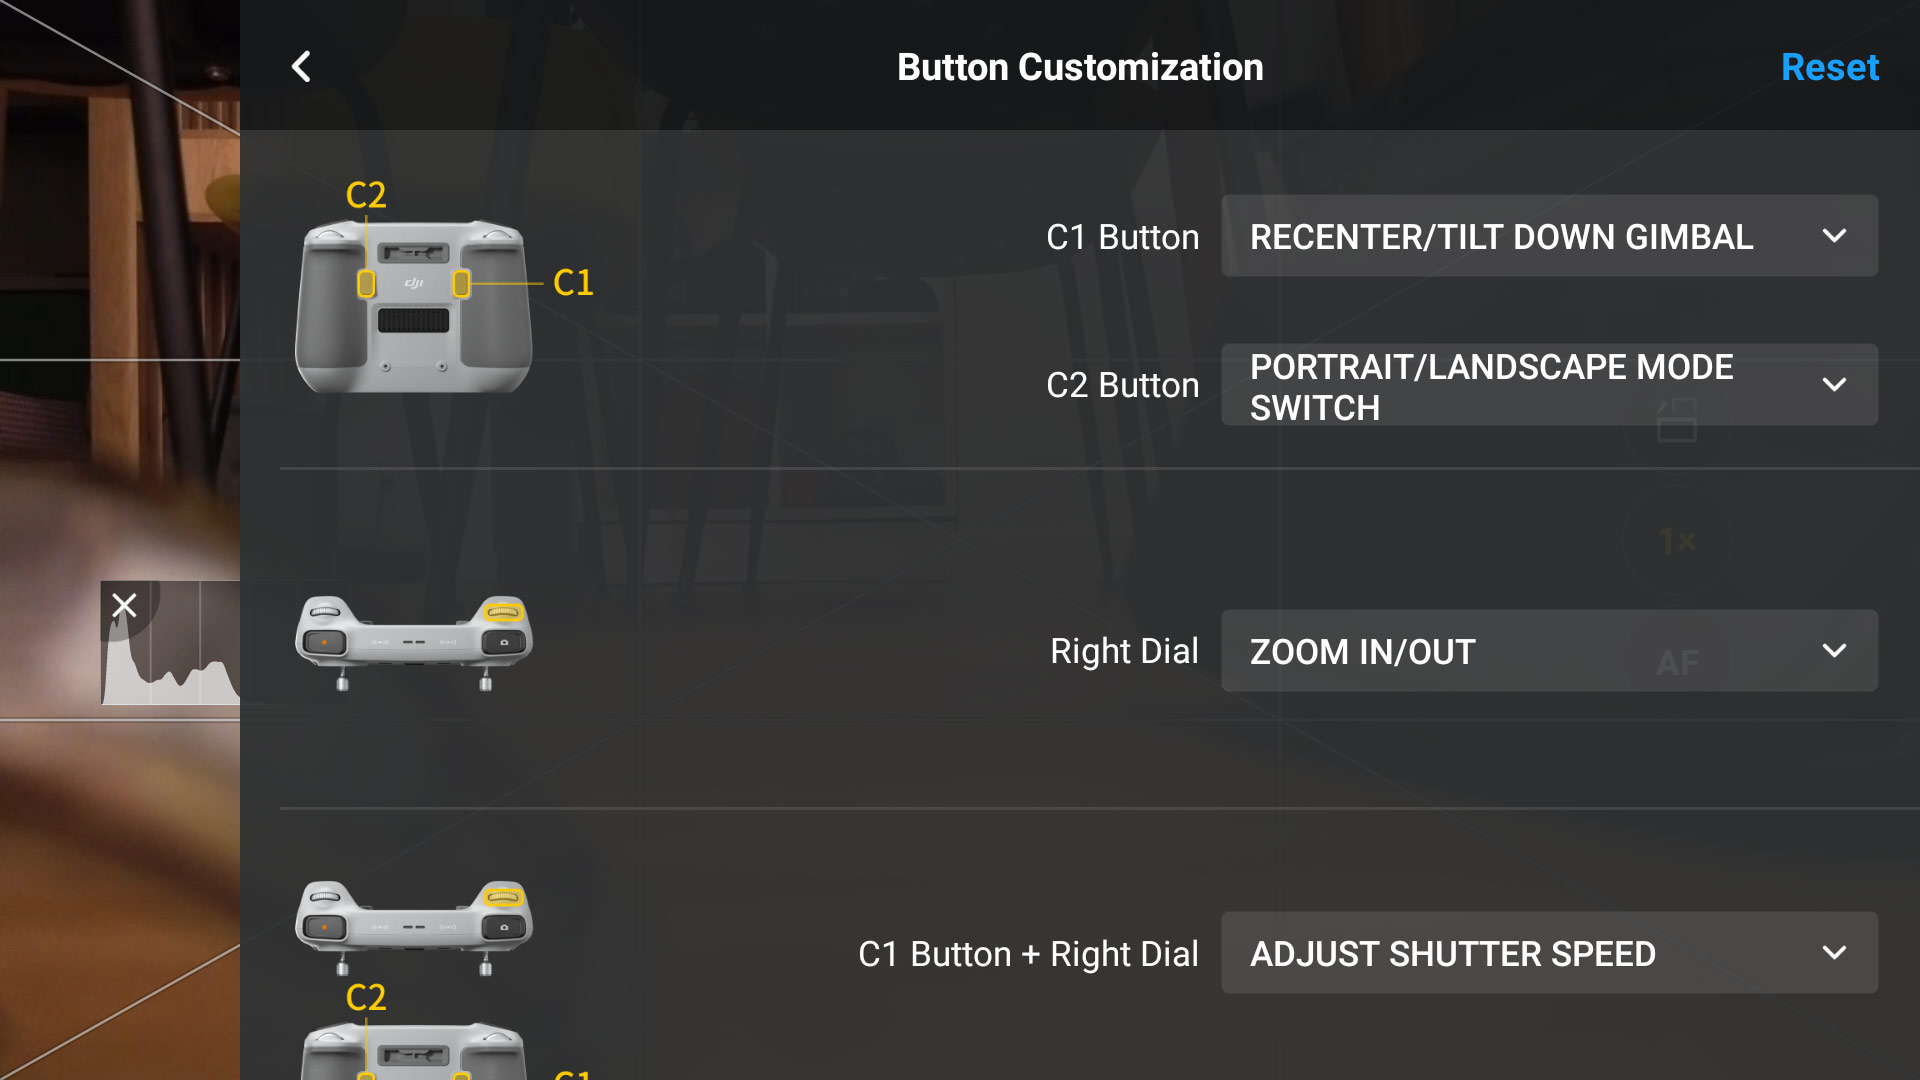
Customize the buttons on the controller to suit your needs
In the Control tab at the bottom, we have the option "Button Customization". By choosing it, we can adjust the function of buttons on the controller to your needs.
The article was created in cooperation with Innpro, a distributor of DJI brand products.